
Most people don’t want their private information publicly available on the internet. Unfortunately, registering a domain automatically lists your name and contact details in a public directory.
The good news is that you can implement domain privacy to protect your personal information. What’s more, this small security measure could be the key to preventing devastating cyberattacks or identity theft.
In this post, we’ll discuss what domain privacy is and why you should consider using it. Then we’ll show you two ways you can implement it on your site. Let’s get started!
An introduction to domain privacy
When you register a domain for your website, you’ll usually have to provide your full name, contact information, and address. Then, the Internet Corporation for Assigned Names and Numbers (ICANN) requires registrars to publish that information in a public directory.
This database, called WHOIS, acts as an address book for the internet. Anyone can use this public resource to find out who owns a specific domain:
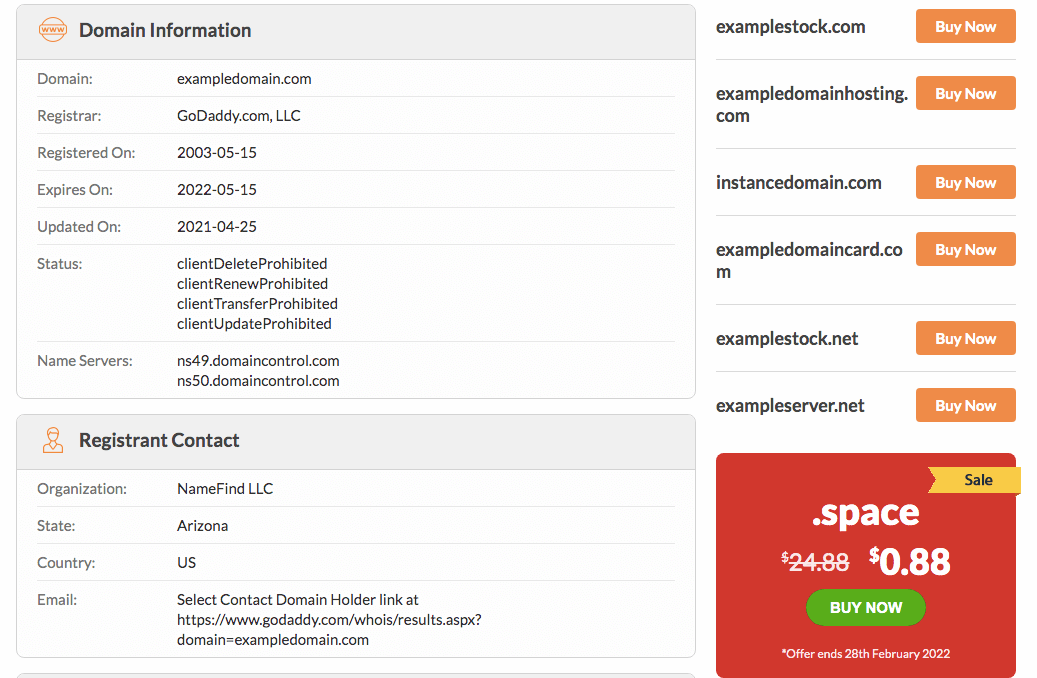
You might use this directory to find available domains, or to contact the owner of a domain you’d like to buy. However, hackers can also take advantage of this service to access and exploit sensitive information.
To avoid this issue, you can implement domain privacy. This is a service that replaces your contact details with forwarding information to a proxy server.
Why you should consider implementing domain privacy
If you don’t safeguard your domain information, your sensitive details could be at risk. You might face hacking, identity theft, spam calls and emails, or cyberattacks.
Often, domain privacy is the key to keeping your personal information secure. This kind of protection lets you:
- Conceal your identity
- Prevent competitors from accessing your information
- Avoid domain theft and third-party changes
- Increase your website security
There is just one major downside to hiding your personal information. If someone wants to buy your domain, privacy protection can make it difficult for them to contact you. However, if you’re not planning to sell your domain, this won’t be an issue.
Additionally, certain Top Level Domains (TLDs) do not support domain protection. For instance, if your URL ends in .us, .uk, or .eu, you won’t be able to get WHOIS privacy.
How to see if you already have domain privacy
Now that you know about the benefits of securing your domain, you’ll likely want to know how you can do it. If you already have a domain, it’s essential that you check to see if you already have this service before you proceed.
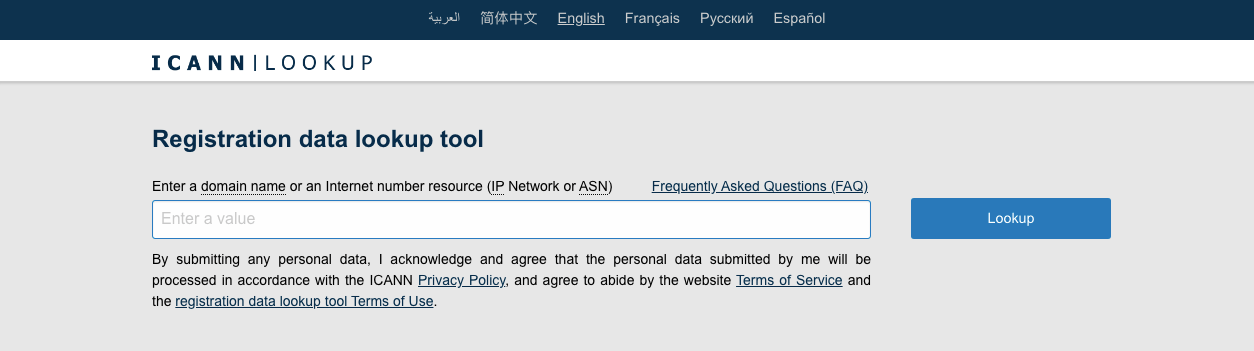
To do this, navigate to the ICANN lookup tool and enter your domain name:
This will list specific details about your domain registration. Scroll down to Contact Information and see if there are any privacy redactions:
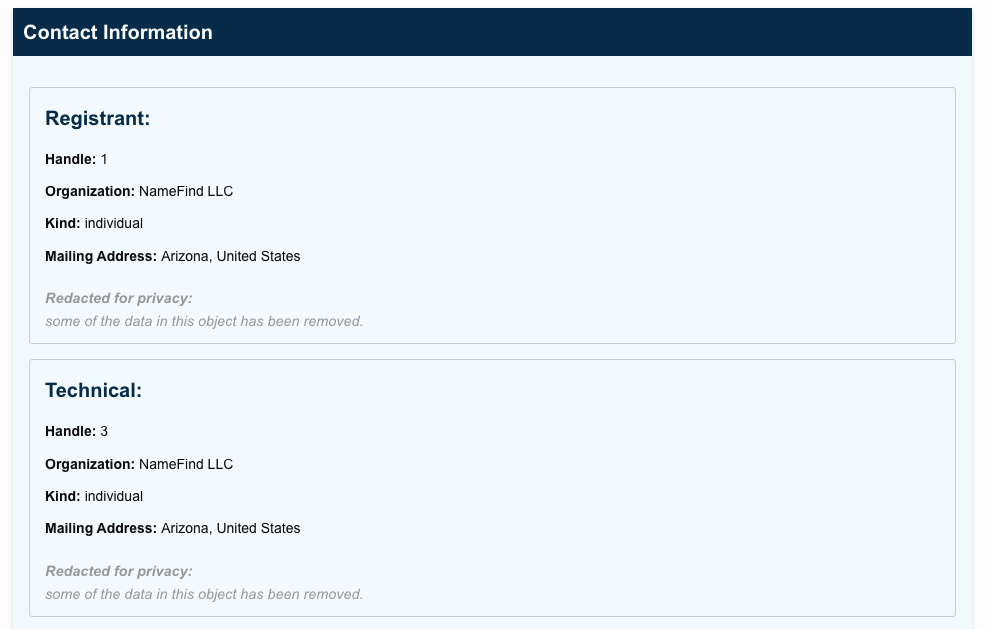
If any personal information is obscured, you likely have domain privacy. You could also look for a forwarding email address or generic contact details. However, if you see personal information that you want to hide. It may be time to get a domain protection plan.
How to implement domain privacy on your website (2 methods)
Now, let’s cover two methods you can use to implement domain privacy on your site. Keep in mind that we’ll provide advice for users who haven’t signed up for a domain yet, as well as for those who have.
1. Get a domain protection plan with your hosting provider
One easy way to implement domain privacy is through your web hosting provider. Many hosting services offer a domain privacy add-on during domain registration.
For example, GoDaddy gives you the option to add domain protection with each of its hosting plans. This removes your contact information from the public directory and replaces it with proxy details.
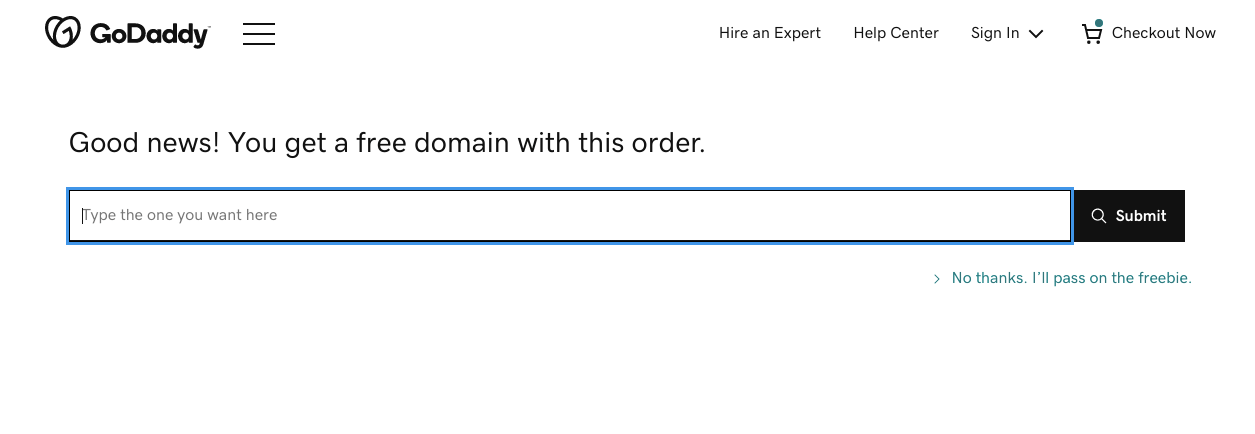
If you don’t already have a domain name or a host, the process is extremely simple. With GoDaddy, you’ll first need to choose a hosting plan. Then, enter the domain name you want to use:
This will automatically add the hosting plan and domain to your cart. At the bottom of the page, you’ll see an option to add domain protection:
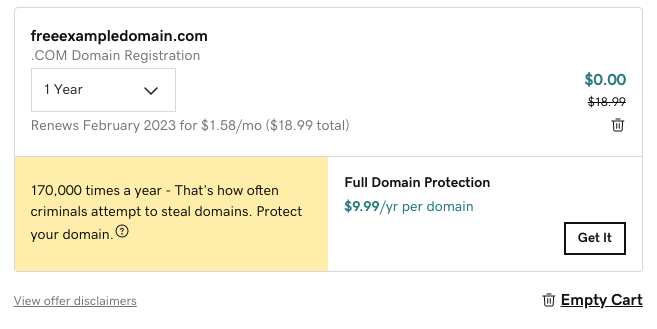
Click on Get It and check out. After this, you’ll be ready to set up your website with a fully-protected domain. If you’re using another web host, the process should be very similar.
On the other hand, if you need to upgrade your protection, you can do this at any time in the My Domains portal. Here, you can choose between three levels of privacy:
- Free Privacy Protection: This option converts your contact information into proxy details from Domains By Proxy.
- Full Domain Protection: This plan enables two-factor authentication for major domain changes, and creates alerts for high-risk activity.
- Ultimate Domain Protection: If your payment method expires during renewal, this plan will allow you to keep your domain for up to 90 days.
With any of these plans, you also gain access to a private email address. This can allow people to contact you without exposing your personal email.
When you’re finished updating your domain privacy, click on Confirm. Then, complete the checkout process. It’s important to note that nearly all domain protection plans will come with a cost, although they are usually affordable.
If you’ve already signed up for a web host and domain, don’t worry. It’s probably not too late to secure your domain. We recommend getting in touch with your provider to inquire about its domain protection plans. Alternatively, you can consult your user account to search for this option.
2. Add domain privacy protection with your domain registrar
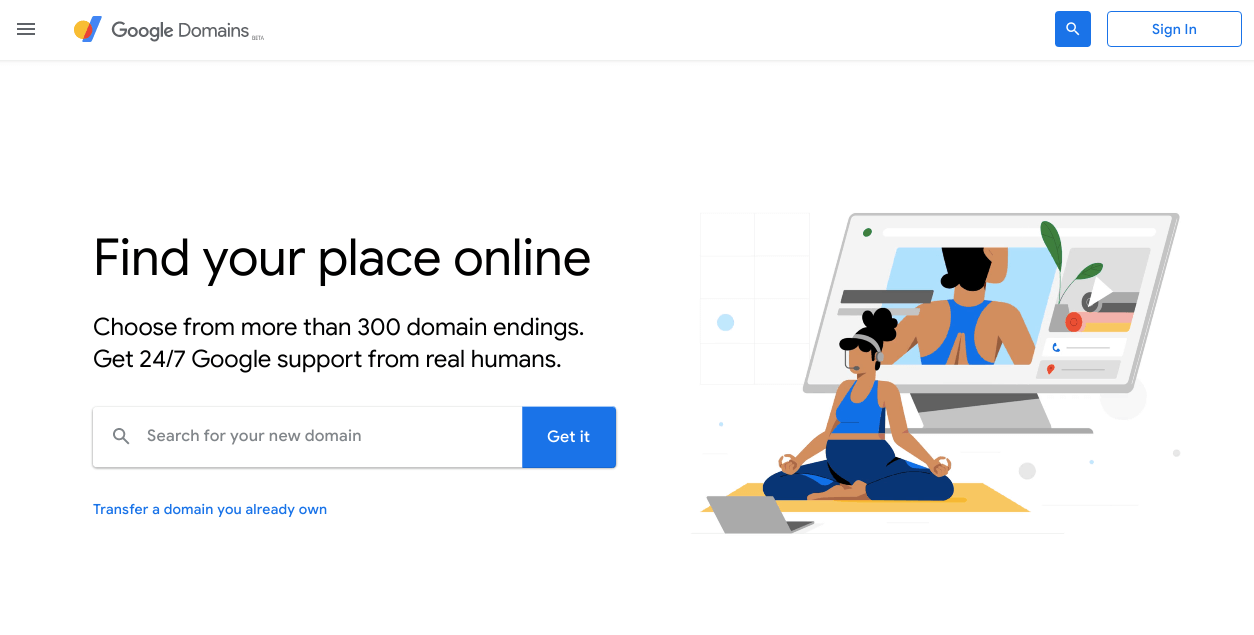
If your hosting provider doesn’t offer domain privacy, you may be able to add a protection plan through your domain registrar. With a service such as Google Domains, you can include domain protection at the initial checkout stage.
If you haven’t purchased your domain yet, start by entering your target URL name in the Google Domains search bar:
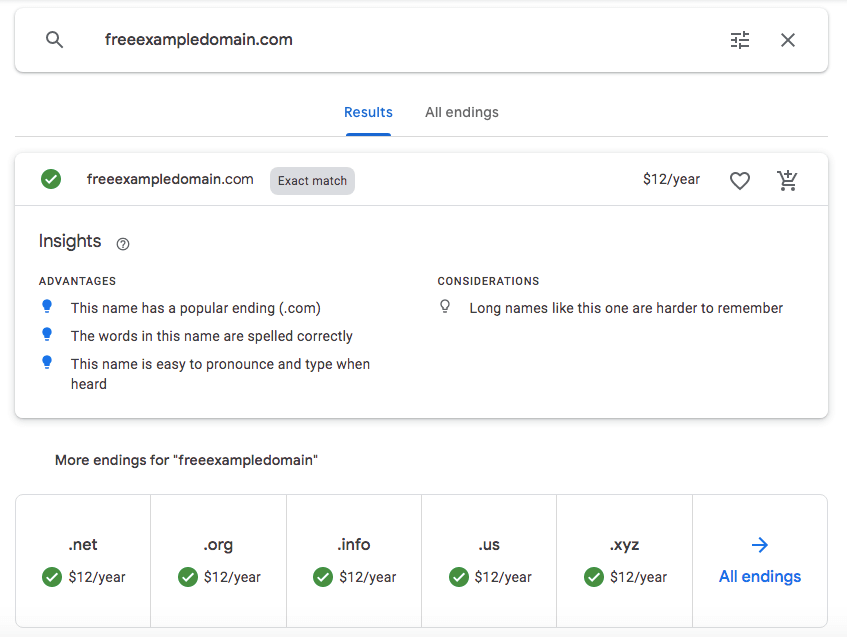
This will show you if your domain is available to purchase. If not, Google Domains will give you suggestions for alternate names or TLDs:
When you find the domain you want, select it and proceed to checkout. In your cart, you’ll see an option for privacy protection under Registration. Use the slider on the left to turn on domain privacy:
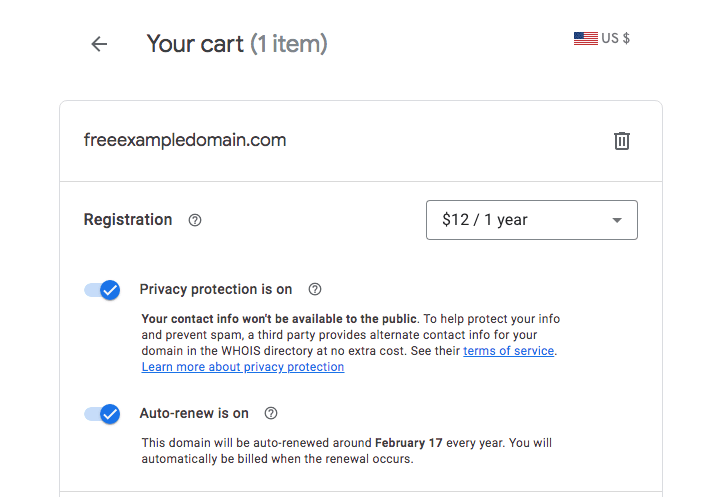
During checkout, you can also add auto-renew and a custom email. After you’ve modified your domain add-ons, click on Check out. Then, you can complete your purchase.
If you want to upgrade an existing plan, the process should be equally straightforward. You can consult your account to investigate your options, or get in touch with your registrar’s support team to find out how you can make this change.
Conclusion
As a website owner, you’ll likely want to prevent your personal information from being exploited. When you choose to use domain privacy, you can keep your information secure. By doing this, you can avoid hacks before they happen.
To recap, here are two simple methods you can use to implement domain privacy on your website:
- Get a domain protection plan with your hosting provider.
- Add privacy protection with your domain registrar.
Do you have any questions about domain privacy? Let us know in the comments section below!
Image credit: Pexels.